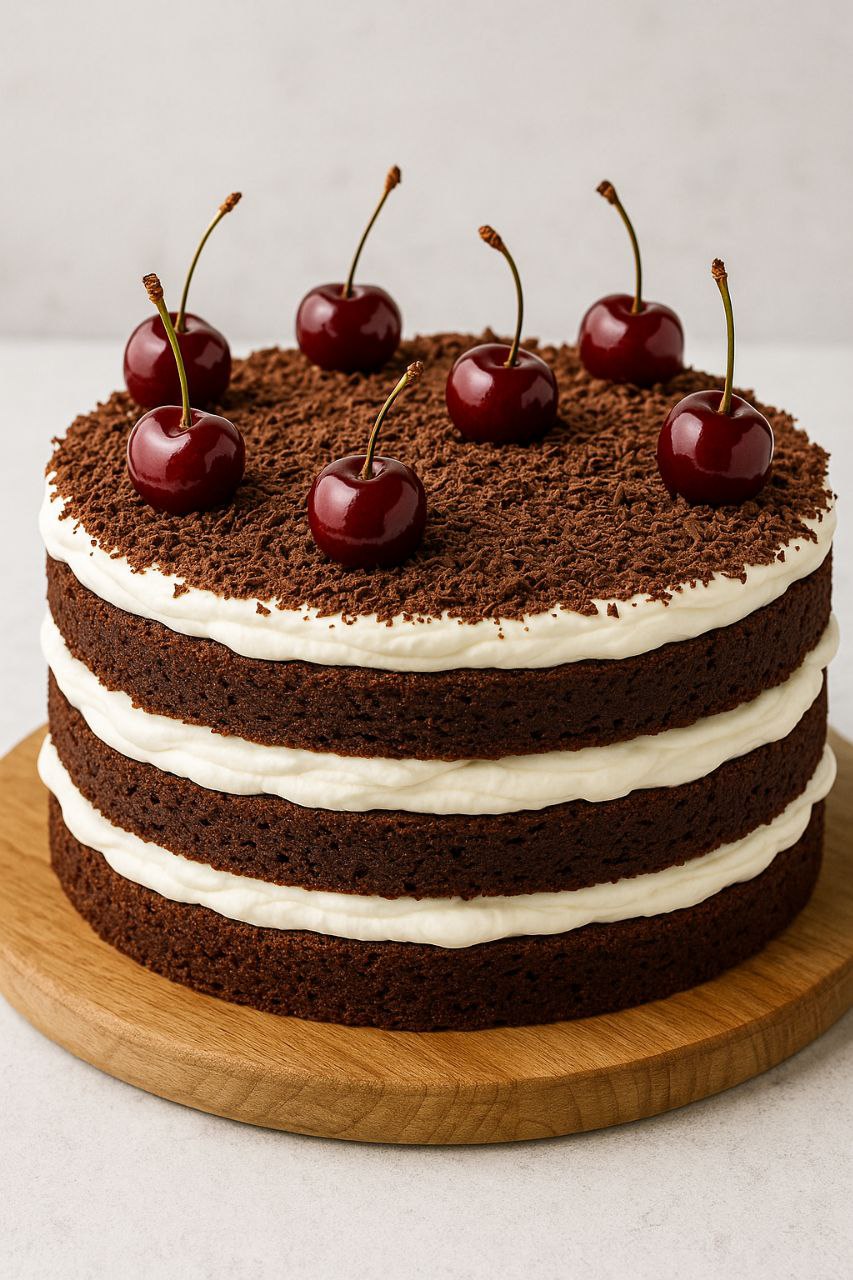
🎂 Cake Black Forest – Step-by-Step Guide
Focus Keyword: Cake Black Forest
Category: Baking | Cake Recipes | Dessert
🍰 Introduction
Looking for the perfect Cake Black Forest for your next celebration? This classic German dessert is a delightful combination of chocolate sponge cake, whipped cream, and sweet cherries, traditionally infused with Kirsch (cherry brandy). It’s rich, decadent, and loved worldwide.
In this blog post, we’ll walk you through a detailed step-by-step Cake Black Forest that’s perfect for birthdays, anniversaries, or just when you’re craving a luxurious homemade cake.
🧾 Ingredients
For Chocolate Sponge Cake (2 layers)
-
1¾ cups (220g) all-purpose flour
-
⅔ cup (60g) unsweetened cocoa powder
-
2 teaspoons baking powder
-
1½ teaspoons baking soda
-
¼ teaspoon salt
-
2 large eggs
-
1¾ cups (350g) granulated sugar
-
1 cup (240ml) buttermilk (room temperature)
-
½ cup (120ml) vegetable oil
-
2 teaspoons vanilla extract
-
1 cup (240ml) hot water or hot coffee
For Cherry Filling
-
2 cups (400g) pitted canned or jarred cherries (sweet or sour)
-
½ cup (120ml) cherry juice (from the jar)
-
¼ cup (50g) sugar
-
2 tablespoons cornstarch
-
1 tablespoon lemon juice
-
Optional: ¼ cup Kirsch (cherry brandy)
For Whipped Cream Frosting
-
3 cups (720ml) heavy whipping cream (chilled)
-
½ cup (60g) powdered sugar
-
1 teaspoon vanilla extract
For Decoration
-
100g dark chocolate shavings
-
Maraschino or fresh cherries for topping
👨🍳 Step-by-Step Instructions
Step 1: Prepare the Chocolate Cake Layers
-
Preheat the Oven
Set your oven to 350°F (175°C). Grease two 8-inch round cake pans and line with parchment paper. -
Mix Dry Ingredients
In a large bowl, sift together flour, cocoa powder, baking soda, baking powder, and salt. -
Mix Wet Ingredients
In a separate bowl, beat the eggs, then add sugar, oil, buttermilk, and vanilla. Mix well until fully combined. -
Combine Wet and Dry Mixtures
Gradually add the wet mixture into the dry ingredients. Stir just until the batter is smooth. -
Add Hot Water
Slowly mix in the hot water or hot coffee. The batter will be thin—this is normal and ensures a moist cake. -
Bake the Cake
Divide the batter evenly into the two pans. Bake for 30–35 minutes, or until a toothpick inserted in the center comes out clean. -
Cool Completely
Let the cakes cool in the pans for 10 minutes, then remove and let them cool completely on wire racks. 
Step 2: Make the Cherry Filling
-
Cook the Filling
In a saucepan, combine cherry juice, sugar, cornstarch, and lemon juice. Stir well to remove lumps. -
Add Cherries
Add the pitted cherries and bring the mixture to a boil. Stir continuously until it thickens into a glossy, jam-like consistency. -
Add Kirsch (Optional)
Remove from heat and stir in the Kirsch for authentic flavor. Let the filling cool completely. 
Step 3: Prepare Whipped Cream Frosting
-
Chill Equipment
Place your mixing bowl and beaters in the freezer for 10 minutes before starting. -
Whip the Cream
Pour cold whipping cream into the bowl. Start beating at medium speed. -
Add Sugar & Vanilla
Gradually add powdered sugar and vanilla extract. Beat until stiff peaks form. Be careful not to overwhip. 
Step 4: Assemble the Cake
-
Level the Cakes
Use a serrated knife to trim the top domes from the cakes if necessary, creating flat layers. -
Slice the Layers (Optional)
For a traditional look, slice each cake in half horizontally to create 4 thin layers. -
Brush with Syrup/Kirsch
Brush each layer with cherry juice or Kirsch to moisten the sponge and add flavor. -
Layer with Filling and Cream
Place the first layer on a cake board or plate. Spread a layer of whipped cream, then spoon cherry filling on top. Repeat for each layer. -
Frost the Cake
Cover the entire cake with whipped cream. Smooth out the sides and top with a spatula. -
Decorate
Press chocolate shavings around the sides. Pipe cream rosettes on top and place a cherry on each. 
🎉 Serving and Storage
-
Chill Before Serving: Let the cake chill for at least 2 hours before serving. This helps the flavors combine and makes slicing easier.
-
Shelf Life: Store in the fridge for up to 3 days. Best consumed within 24 hours for freshness.
💡 Pro Tips for Perfect Black Forest Cake
-
Stabilize the Whipped Cream: Add 1 tablespoon of cornstarch or gelatin to keep it firm longer.
-
Use Quality Chocolate: Fresh chocolate shavings or curls give better taste and texture.
-
Make Ahead: Cake layers and cherry filling can be made a day in advance and stored separately.
📌 Final Words
This Cake Black Forest is a timeless dessert that never fails to impress. Whether you’re making it for a birthday or a festive celebration, it delivers indulgent flavors and beautiful presentation. Try it once, and it’ll become your go-to cake recipe for every special occasion
- Authentic Gujarati Handvo Recipe – 2025
- The Ultimate Medu Vada Recipe – 2025
- Authentic Falafel Recipe:2025
- Healthy Undhiyu Recipe: A Wholesome Gujarati Winter Delicacy2025
- Instant Rava Uttapam: Quick & Delicious South Indian Pancakes – 2025
- Aauthentic Italian Margherita Pizza Recipe – A Taste of Italy at Home 2025
- Paneer Handi Recipe (Restaurant Style)