Medu Vada Recipe: Crispy, Fluffy, and Authentic South Indian Delight
Are you craving a taste of authentic South India? Look no further than the humble yet incredibly satisfying Medu Vada! These iconic, doughnut-shaped lentil fritters are a staple in South Indian cuisine, cherished for their crispy exterior, soft and fluffy interior, and delightful savory flavor. Whether you’re enjoying them for breakfast with a steaming cup of filter coffee, as a teatime snack, or as part of a grand South Indian thali, Medu Vada never fails to impress. This comprehensive, step-by-step recipe will guide you through every nuance of preparing the perfect Medu Vada, ensuring you achieve restaurant-quality results right in your own kitchen.
Why Medu Vada Reigns Supreme: A Culinary Journey
Medu Vada, often spelled “Medu Wada,” literally translates to “soft vada” in Kannada, a testament to its desirable texture. Originating from the Udupi region of Karnataka, these savory fritters have become synonymous with South Indian comfort food across the globe. Their popularity isn’t just about taste; it’s about the experience. The crisp crunch followed by the melt-in-your-mouth softness, often paired with tangy sambar and creamy coconut chutney, creates an explosion of flavors and textures that keeps you coming back for more.
Beyond its culinary appeal, Medu Vada is also a surprisingly versatile dish. While traditionally made with urad dal (black gram), variations exist, and the spices can be adjusted to suit individual preferences. The key to a perfect Medu Vada lies in the batter’s consistency, the fermentation process (or lack thereof, depending on the technique), and the frying method. Don’t be intimidated; with this detailed guide, you’ll master the art of Medu Vada making in no time!
Health Benefits & Dietary Considerations
Urad dal, the primary ingredient, is a powerhouse of nutrition. It’s an excellent source of protein, dietary fiber, and essential minerals like iron, potassium, and magnesium. This makes Medu Vada a more wholesome snack compared to many fried alternatives. For those concerned about oil consumption, you can opt for an air fryer, though the traditional deep-fried version offers unparalleled texture. This recipe is naturally gluten-free, making it suitable for individuals with gluten sensitivities.
Essential Equipment You’ll Need
Before we dive into the ingredients and steps, let’s ensure you have the necessary kitchen tools:
-
Large Mixing Bowl: For soaking the dal and mixing the batter.
-
Wet Grinder or High-Powered Blender/Food Processor: Crucial for achieving the right batter consistency. A wet grinder is ideal for large batches and yields the best texture, but a good blender can also work.
-
Frying Pan or Kadai: A deep, heavy-bottomed pan for deep frying.
-
Slotted Spoon or Spider Strainer: For safely removing the vadas from hot oil.
-
Absorbent Paper/Kitchen Towels: For draining excess oil.
-
Spatula: For stirring and handling.
-
Small Bowls: For serving sambar and chutney.
The Perfect Medu Vada Recipe: Step-by-Step Guide
This recipe is designed for approximately 4-6 servings, yielding about 15-20 medium-sized Medu Vadas.
Ingredients:
-
1 cup (200g) Whole Urad Dal (Black Gram Dal), split or whole (without skin): This is the star ingredient. Opt for good quality dal for best results.
-
1 medium Onion, finely chopped (optional, but highly recommended for flavor)
-
2-3 Green Chillies, finely chopped (adjust to your spice preference)
-
1 inch Ginger, finely grated or minced
-
1 sprig Curry Leaves, finely chopped
-
1/2 tsp Black Peppercorns, crushed or coarsely ground (optional, adds a nice bite)
-
1/4 tsp Asafoetida (Hing)
-
1/2 tsp Cumin Seeds
-
Salt to taste (approximately 1-1.5 tsp)
-
Water, for soaking and grinding (use very sparingly during grinding)
-
Oil, for deep frying

Instructions:
Step 1: Soaking the Urad Dal (The Foundation of Fluffy Vadas)
-
Thoroughly rinse the urad dal under cold running water several times until the water runs clear. This removes any impurities and makes the dal easier to digest.
-
Place the rinsed urad dal in a large bowl and add enough fresh water to completely submerge the dal, ensuring there’s about 2-3 inches of water above the dal level.
-
Soak the dal for a minimum of 4-6 hours, or preferably overnight. Proper soaking is crucial for the dal to soften sufficiently, which in turn helps in achieving a smooth batter and a soft interior in the vadas. If you’re short on time, you can soak it in hot water for 2-3 hours, but cold soaking is generally preferred.

Step 2: Grinding the Batter (The Secret to the Perfect Texture)
-
Once the dal is fully soaked, drain all the water completely. It’s very important to remove as much water as possible.
-
Transfer the soaked and drained urad dal to your wet grinder or high-powered blender/food processor.
-
This is the most critical step for Medu Vada success. Begin grinding the dal without adding any water initially.
-
As the grinding progresses, the mixture will be thick. Add water very, very sparingly, one tablespoon at a time, only if absolutely necessary to get the blades moving. The goal is to achieve a thick, smooth, and fluffy batter. The less water you add, the crispier your vadas will be.
-
Grind until the batter is incredibly smooth, airy, and light. If you’re using a wet grinder, this might take 20-30 minutes. In a blender, it might take 5-10 minutes, with pauses to prevent overheating. The batter should be the consistency of thick pancake batter, but light and aerated.
-
Performing the “Water Test”: To check if the batter is ready, drop a small spoonful of batter into a bowl of water. If it floats immediately to the surface, your batter is perfectly aerated and ready. If it sinks, you need to grind it for a little longer. This aeration is what gives Medu Vada its characteristic softness and fluffiness.
- 6

Step 3: Preparing the Vada Mixture (Infusin the Flavors)
-
Transfer the ground urad dal batter to a large mixing bowl.
-
Add the finely chopped onion (if using), chopped green chillies, grated ginger, chopped curry leaves, crushed black peppercorns (if using), asafoetida, cumin seeds, and salt to taste.
-
Gently mix all the ingredients into the batter. Do not overmix; just combine everything evenly. You want to retain as much of the air incorporated during grinding as possible.

Step 4: Shaping the Medu Vadas (The Iconic Doughnut Shape)
This step can be a bit tricky initially, but practice makes perfect!
Method 1: Using Your Hands (Traditional & Most Common)
-
Keep a small bowl of water next to you. Dip your right hand (or dominant hand) into the water to moisten it. This prevents the batter from sticking.
-
Take a golf ball-sized portion of the batter in your wet hand.
-
Gently flatten it slightly in your palm to form a disc shape.
-
Using your thumb or index finger, create a hole in the center of the disc, just like a doughnut. Ensure the hole goes all the way through.
-
Carefully slide the shaped vada off your hand directly into the hot oil.
Method 2: Using a Flat Spoon/Spatula
-
Moisten a flat spoon or spatula with water.
-
Place a portion of batter onto the spoon.
-
Create a hole in the center using a wet finger or the tip of another wet spoon.
-
Carefully slide the vada into the hot oil.
Method 3: Using a Vada Maker (For Beginners)
If you have a specialized vada maker, follow the manufacturer’s instructions. These can be very helpful for consistent shaping.

Step 5: Deep Frying the Medu Vadas (Achieving Golden Perfection)
-
Heat oil in a deep frying pan or kadai over medium-high heat. The oil temperature is crucial. To test if the oil is ready, drop a tiny piece of batter into it. If it sizzles and immediately floats to the surface, the oil is at the right temperature (around 170-180°C or 340-350°F). If it sinks, the oil isn’t hot enough. If it browns too quickly, the oil is too hot – reduce the flame.
-
Once the oil is hot, carefully slide the shaped vadas into the oil, a few at a time. Do not overcrowd the pan, as this will lower the oil temperature and result in greasy vadas. Fry in batches.
-
Fry the vadas, turning them occasionally with a slotted spoon, until they are golden brown and crispy on all sides. This usually takes 5-7 minutes per batch.
-
Once golden brown, remove the vadas using a slotted spoon and transfer them to a plate lined with absorbent paper/kitchen towels to drain any excess oil.

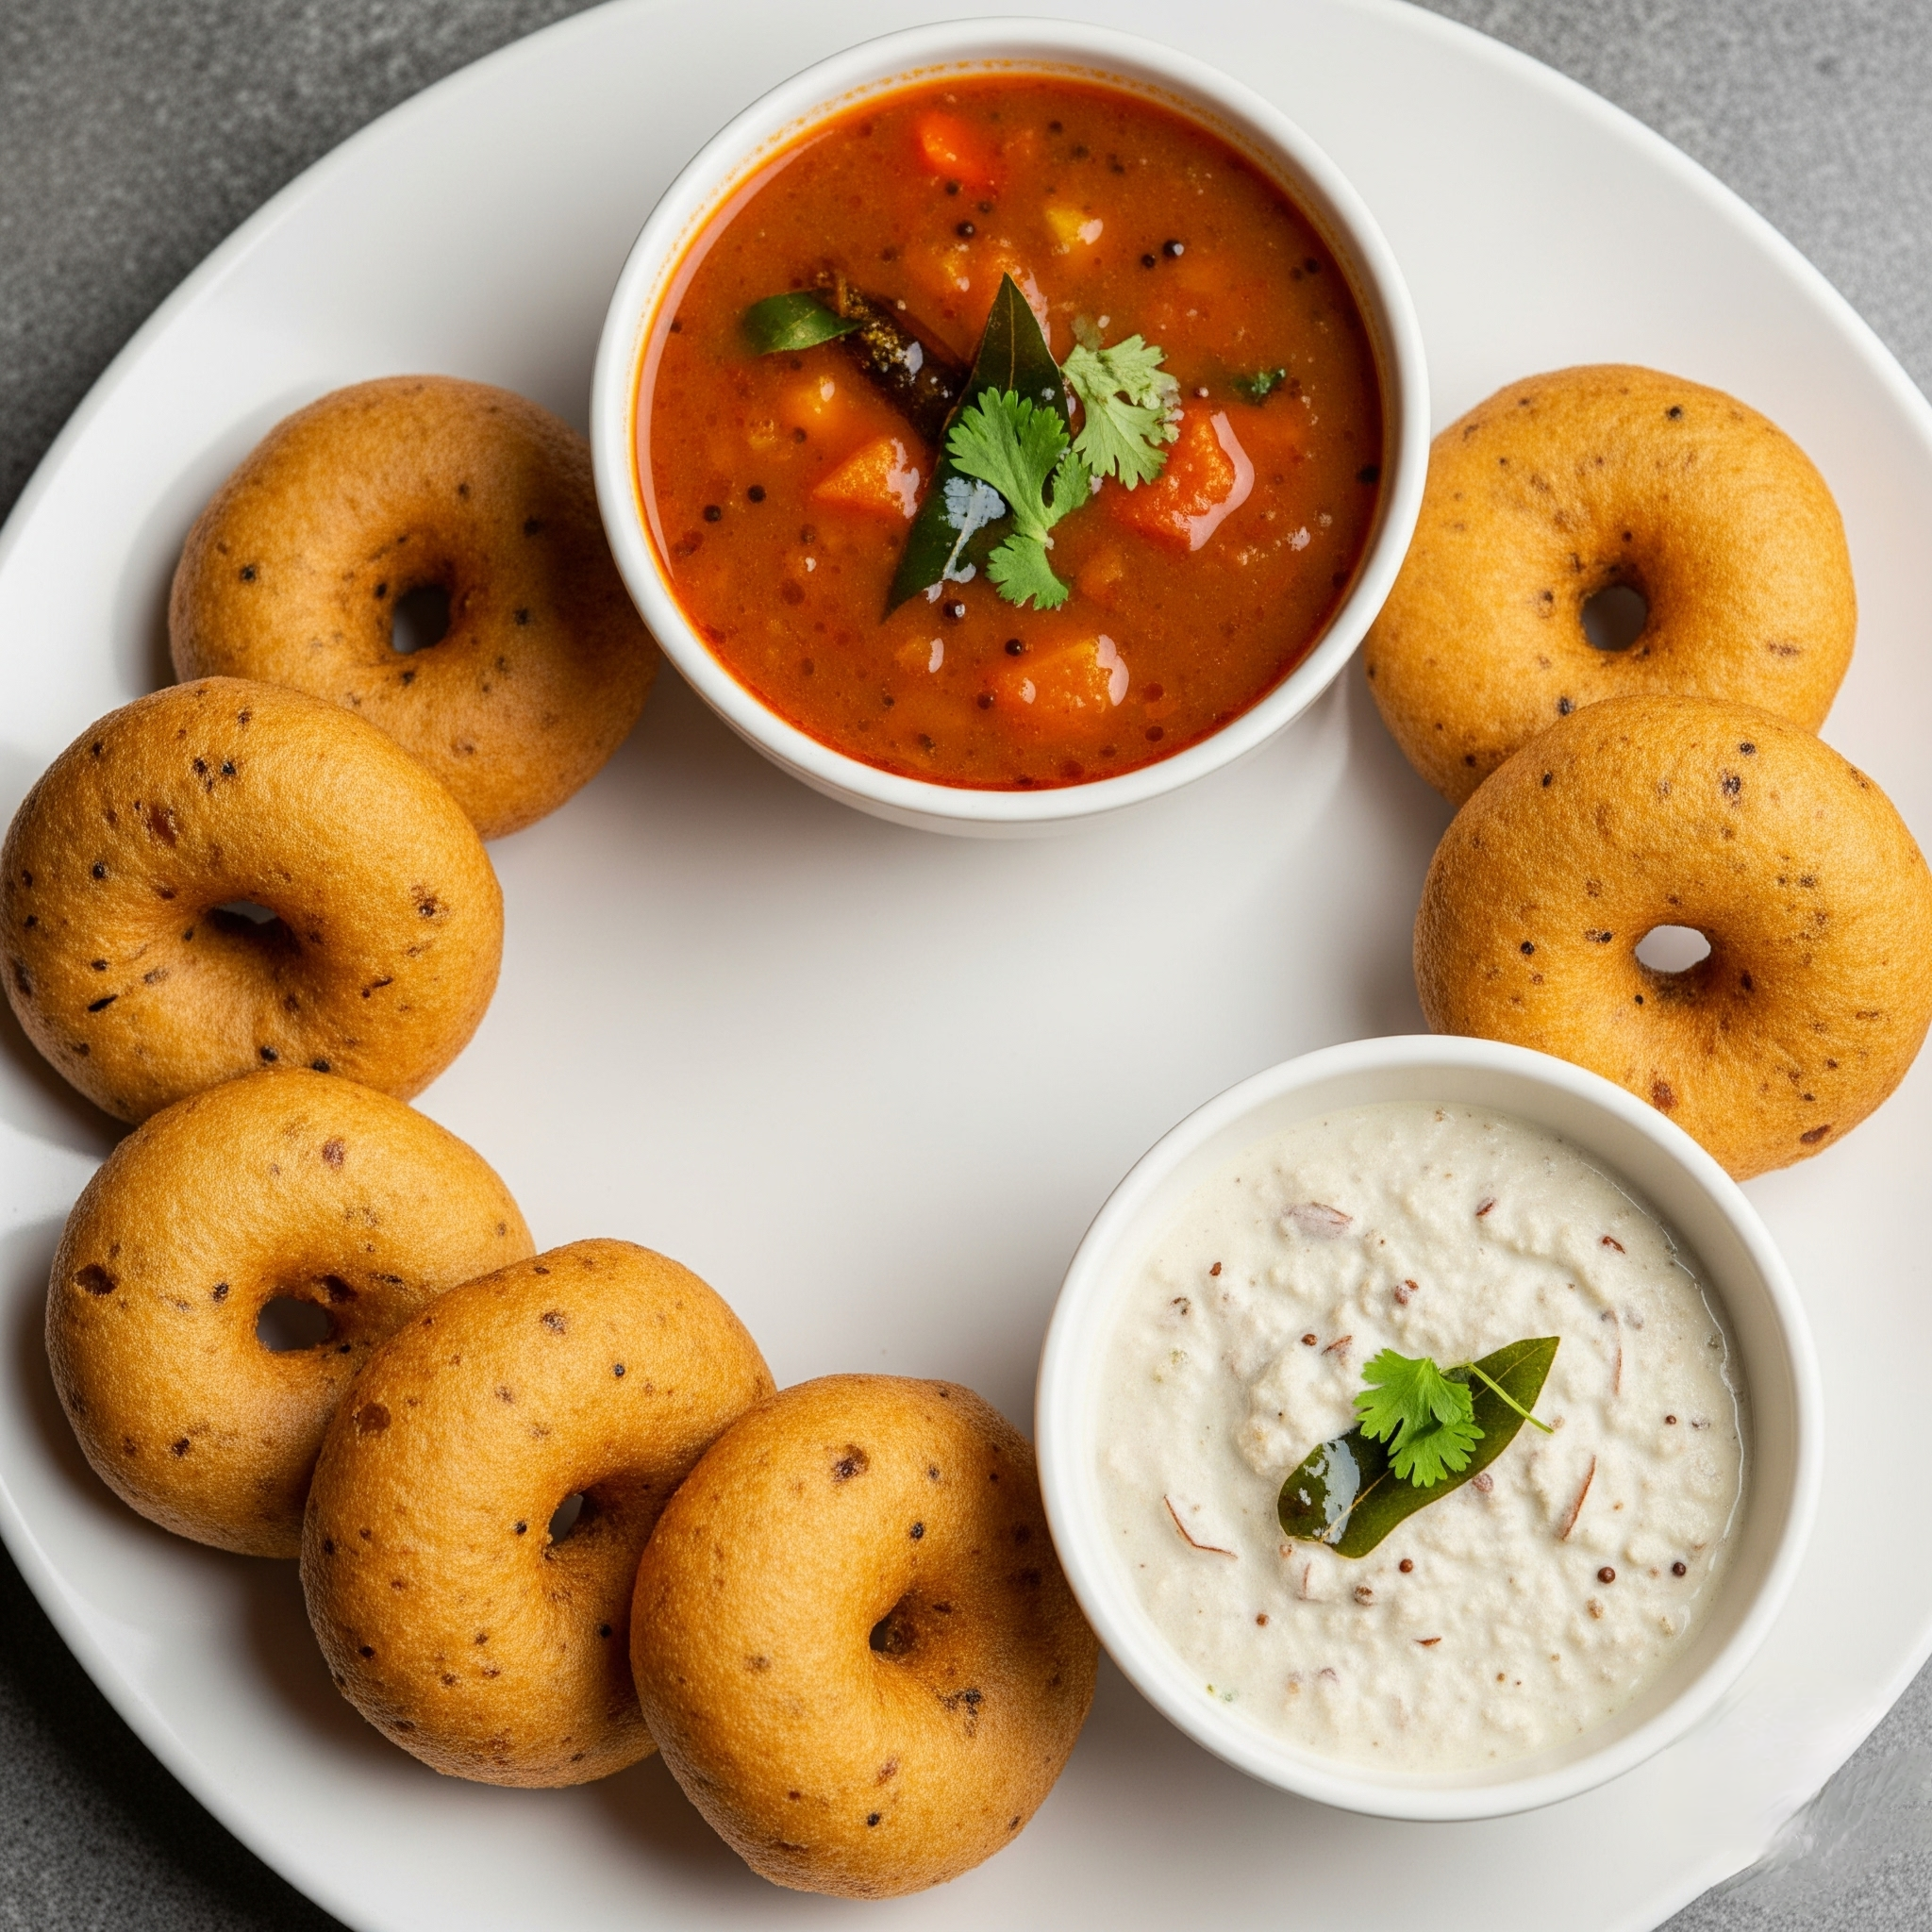
Step 6: Serving Your Delicious Medu Vadas
-
Serve the Medu Vadas immediately while they are hot and crispy.
-
Traditional accompaniments are non-negotiable! Serve them with:
-
Hot Sambar: A flavorful lentil and vegetable stew, quintessential with Medu Vada.
-
Coconut Chutney: A creamy and refreshing chutney that perfectly balances the vada’s savory notes.
-
Tomato Chutney or Mint Chutney: Excellent alternatives if you prefer.

-
Pro Tips for Medu Vada Success: Master the Art!
-
Don’t Rush the Soaking: Patience pays off here. Well-soaked dal results in easier grinding and a better texture.
-
The Power of Cold Water Grinding: If using a blender, add ice-cold water or even a few ice cubes while grinding. This prevents the batter from heating up and ensures a fluffy texture.
-
Batter Consistency is King: This cannot be stressed enough. Too thin, and your vadas will absorb too much oil and be flat. Too thick, and they’ll be dense. Aim for a light, aerated, yet thick consistency that floats in water.
-
Taste the Batter: Before frying, taste a tiny bit of the raw batter (if comfortable) to adjust the salt and spice levels.
-
Pre-mix Spices: If you’re new to this, you can combine the chopped ingredients and spices in a small bowl before adding them to the batter.
-
Use Fresh Oil: Always fry in fresh oil for the best taste and texture. Reusing old oil can impart an off-flavor.
-
Maintain Oil Temperature: If the oil gets too hot, reduce the flame. If it cools down too much (e.g., after adding a new batch), let it come back up to temperature before adding more vadas.
-
Crispy Edges, Soft Center: The ideal Medu Vada has a beautiful golden-brown, crisp exterior that gives way to a wonderfully soft and airy interior.
Variations to Explore: Customizing Your Medu Vada
-
No Onion Medu Vada: For those who prefer no onion, simply omit it. The vada will still be delicious.
-
Ginger-Garlic Paste: For an extra aromatic kick, add a teaspoon of ginger-garlic paste to the batter.
-
Rice Flour Addition: Some recipes suggest adding 1-2 tablespoons of rice flour to the batter. This can make the vadas slightly crispier, but use sparingly to avoid a hard texture.
-
Mixed Dal Vada: While not traditional Medu Vada, you can experiment with adding a small amount of other dals like moong dal or chana dal for a different flavor profile.
-
Spicier Vadas: Amp up the green chillies or add a pinch of red chilli powder.
-
Herbal Infusion: Experiment with finely chopped coriander leaves or a pinch of dried fenugreek leaves (kasuri methi) for unique flavors.
Storage and Reheating Tips
Medu Vadas are best enjoyed fresh, hot, and crispy. However, if you have leftovers:
-
Storage: Store cooled Medu Vadas in an airtight container at room temperature for up to 1 day or in the refrigerator for 2-3 days.
-
Reheating: To regain some crispness, reheat them in a preheated oven at 180°C (350°F) for 5-7 minutes, or in an air fryer for 3-5 minutes until heated through and crisp. Avoid microwaving, as it will make them soggy.
Conclusion: Your Journey to Medu Vada Mastery
Medu Vada is more than just a dish; it’s a culinary experience that embodies the warmth and richness of South Indian culture. By following this detailed, step-by-step guide, you’re not just making a recipe; you’re embarking on a journey to recreate an authentic taste of India in your own home. With a little practice, patience, and attention to detail, you’ll be consistently churning out perfectly crispy, fluffy, and flavorful Medu Vadas that will impress your family and friends. So, gather your ingredients, fire up your grinder, and get ready to savor the irresistible delight of homemade Medu Vada! Happy cooking!